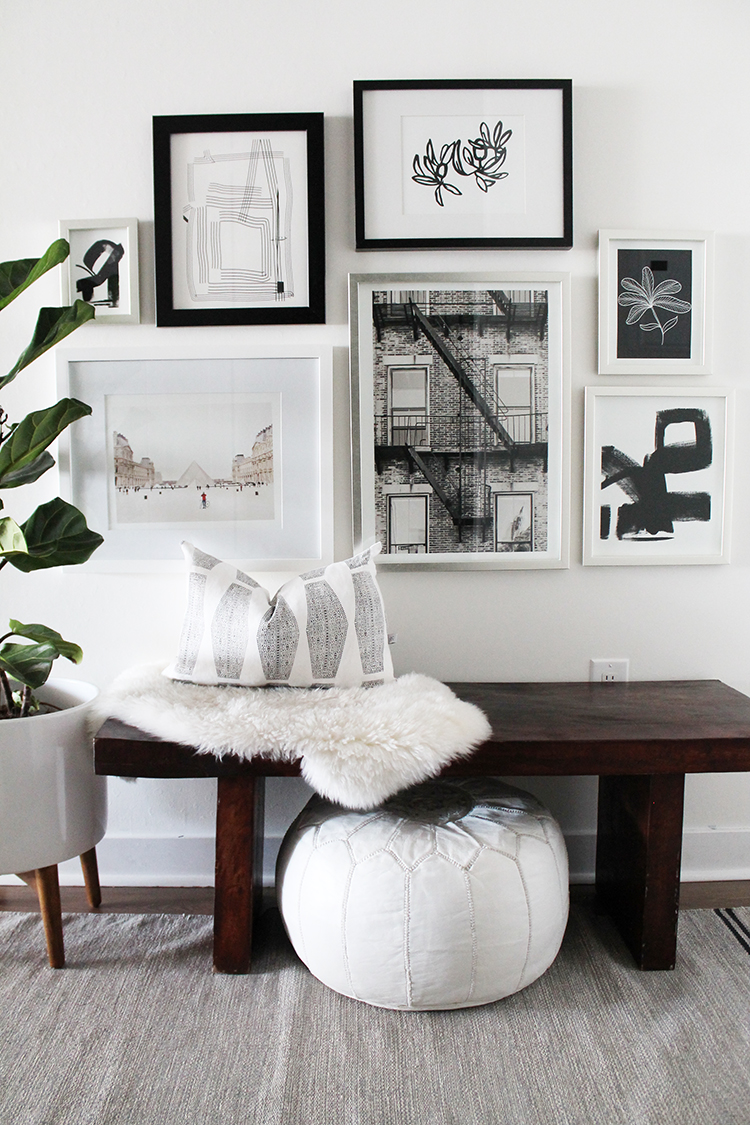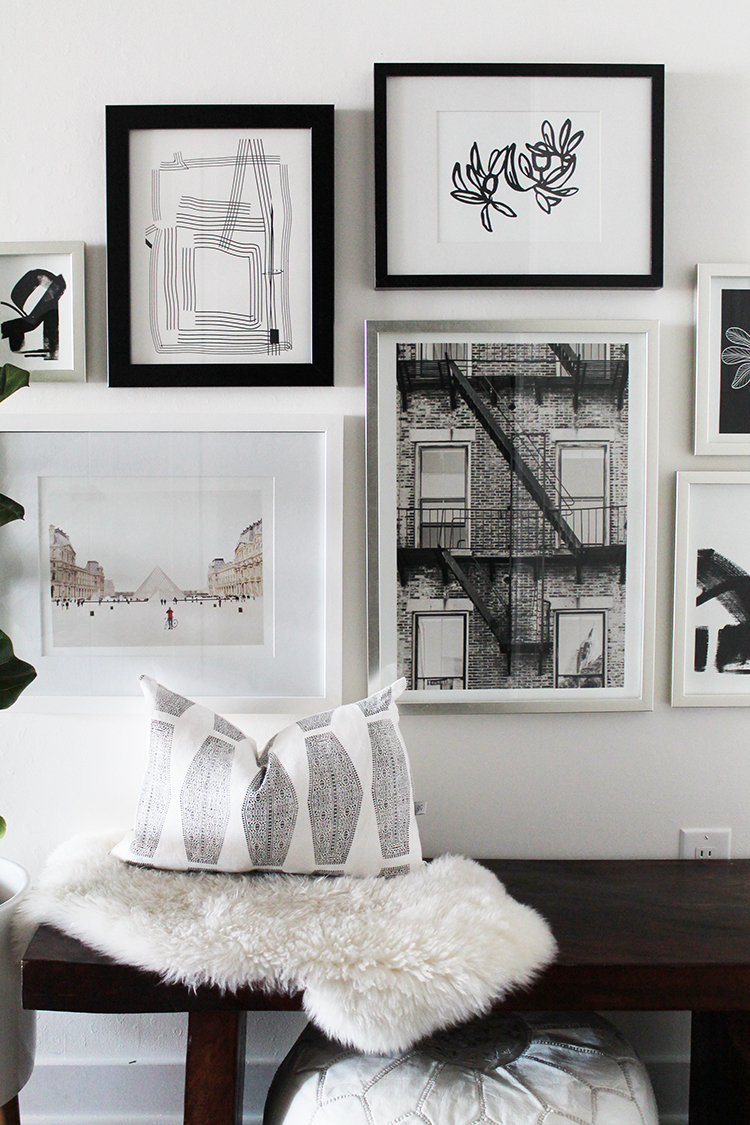
The first step in creating a gallery wall is identifying the color palette you want to follow. Even though you don’t necessarily need to commit to a specific color story, if there’s a common element throughout the composition it will tie it all together and look cohesive. That element can be a color (or combination of two or more), a shape, or a specific theme such as nature, travel or architecture to name a few. I think that the most important thing to consider is that the art represents your style and taste, that it feels “you”.
Once you have chosen the theme, which could also be inspired by pieces you already own, you can start looking for art. Some favourite places to find great art are Etsy (some favourite shops are this, this and this), Minted, Furbish (they usually have great artist pop-ups), West Elm, and then local shops and flea markets for vintage finds that add a unique character.
Determine the style of your gallery wall. Are you looking for a symmetrical and classic layout or is it a free-flowing layout what you are after? If you’re going with a free-flowing style (like I did), consider having art in different sizes to add more dynamism and interest. It’s always good to start with one big piece and work your way around it.
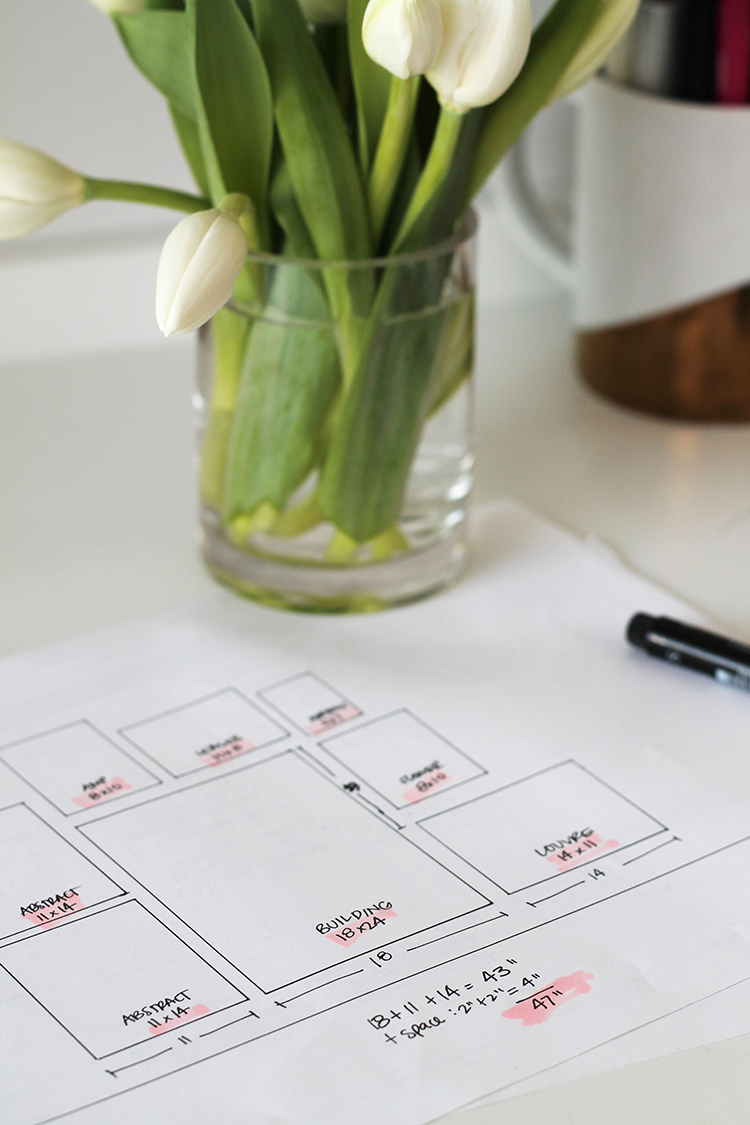
Make sure you measure your wall and once you start selecting art and narrowing down some choices make a mock-up to make sure they will fit in your space.
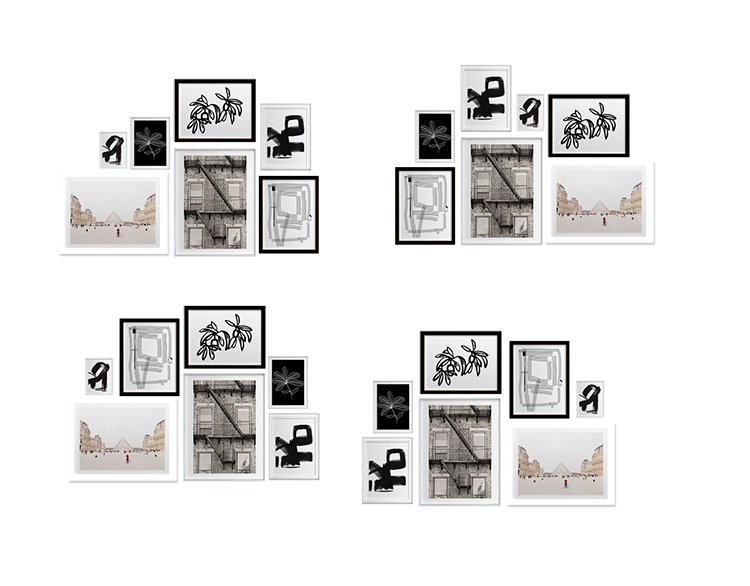
Once you have chosen the art then it’s time to choose the frames. For a clean and classic look go with one style of frames, and for a more eclectic look try different finishes and sizes. I like to do a mockup of the layout with the frames to have a clear idea of how it will look. I do this on photoshop with photos of frames I find on the web or with photos of the actual art I’m ordering (in the case you’re ordering online of course). If you have some existing art, then just snap a photo and play with that.

And that’s it! Any tips I didn’t cover and you’d like to share?